Download the FREE DIAPER PATTERN HERE
—————————————–
Hi friends!
I know you guys like making diaper covers, cause I’ve been watching you do it for years.


The Perfect Diaper Cover pattern was one of those first really detailed tutorials + patterns that I put up on the blog, many years ago. So I decided it was time to give it a baby face lift.
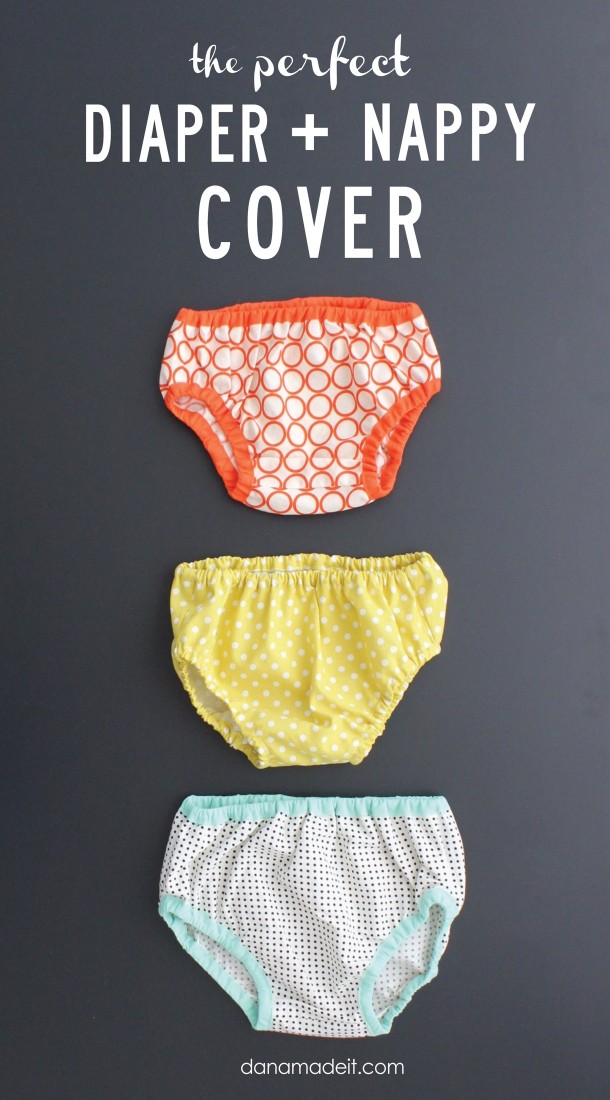
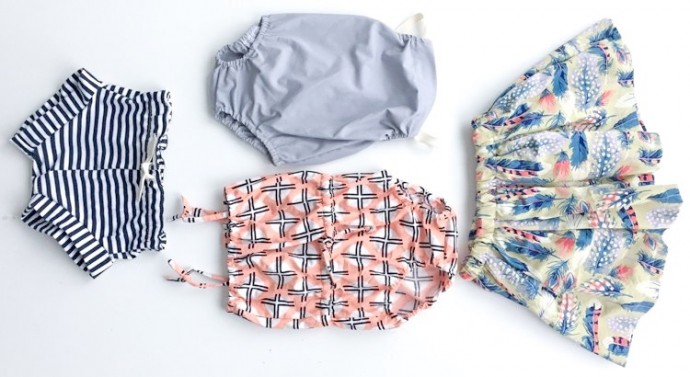
This is the new and improved Perfect Diaper + Nappy Cover
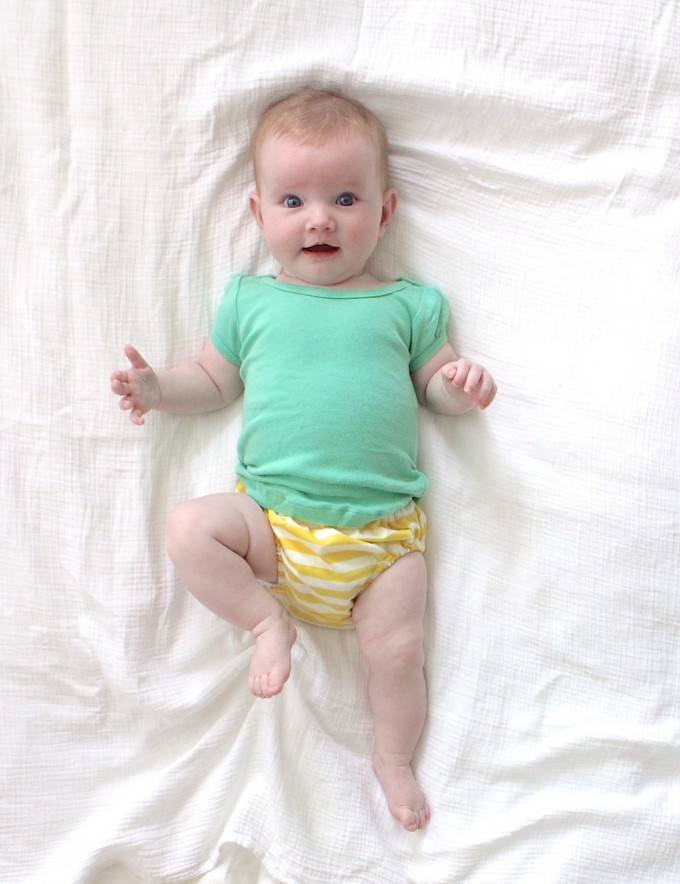
You can watch my video version of this tutorial by pressing the play button below (or clicking here).
OR keep reading for the blog post version…
The age old question I continue to ask myself is, when?
When will manufacturers make plain, white, solid-colored diapers?? I will be first in line to order them by the ton.
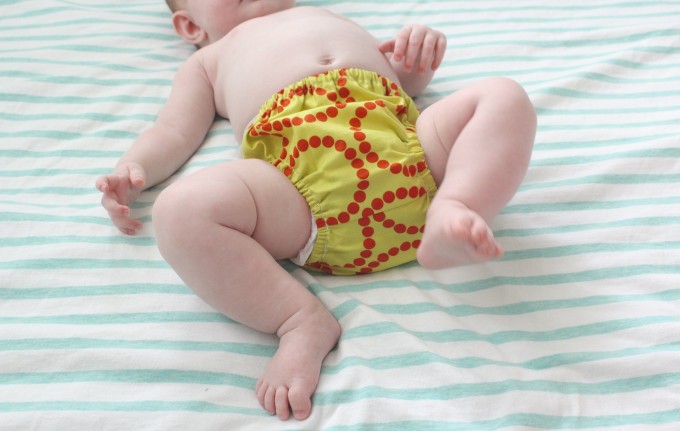
But until that happens, I guess a simple diaper or nappy cover is the perfect thing to wear under a summer dress or with a little t-shirt or with a bare belly! Yum.
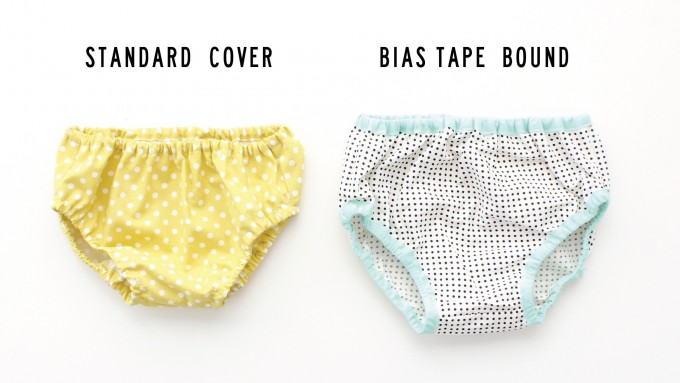
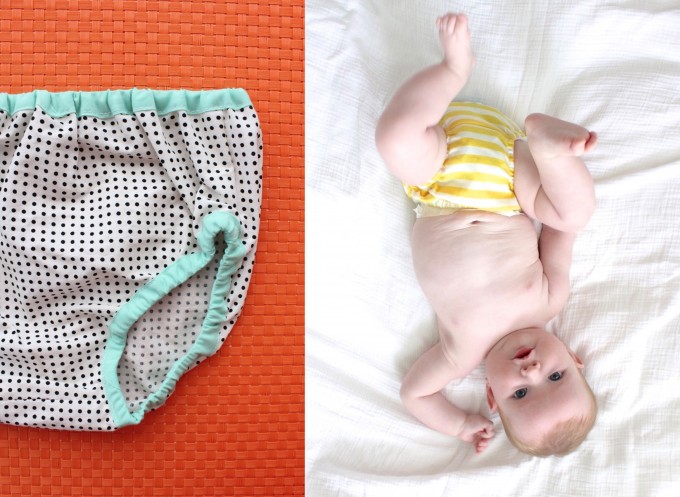
They work for boys and girls. And I’ll show you two ways to make them:
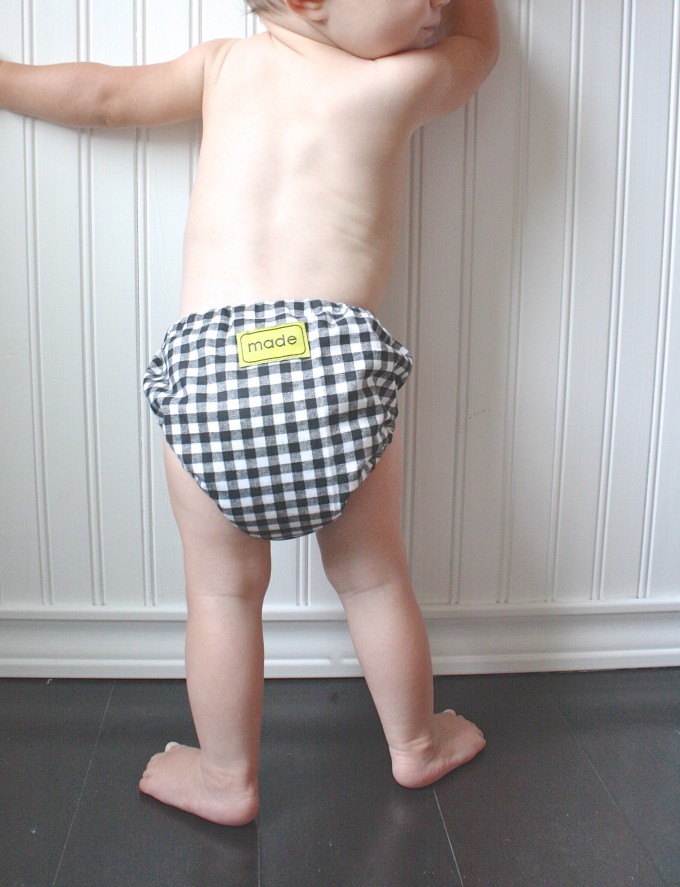
Then your babe will be chilling or cruising in comfy style.
Let’s get started!
And for more variations on the Diaper Cover, check out these FOUR tutorials by Miranda at One Little Minute:
PATTERN
Download the Free 4-page pattern HERE
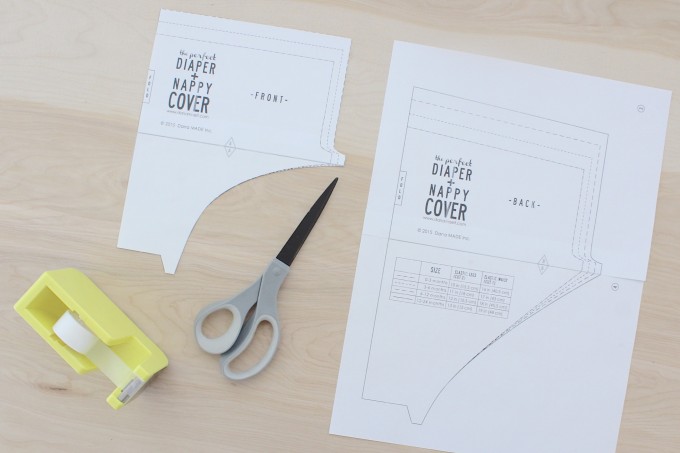
• You’ll automatically be prompted to open the PDF document in Preview or Adobe Acrobat.
• Do not print from a pop up version of the pattern, but rather Save/Export the pattern to your computer first. THEN reopen it and print the document to your home printer.
• DO NOT shrink or “scale to print” in your settings. You want the pattern to print at 100%. Check the 1-inch square box on the pattern with a ruler to make sure it printed to the proper size.
Now we need to piece the 4 pages together, which is easy to do (refer to the photos below).
• Page 1 and 2 go together and match up at the triangles marked “A” (which create a diamond when they’re put together). Page 3 and 4 go together and match up at “B” triangles.
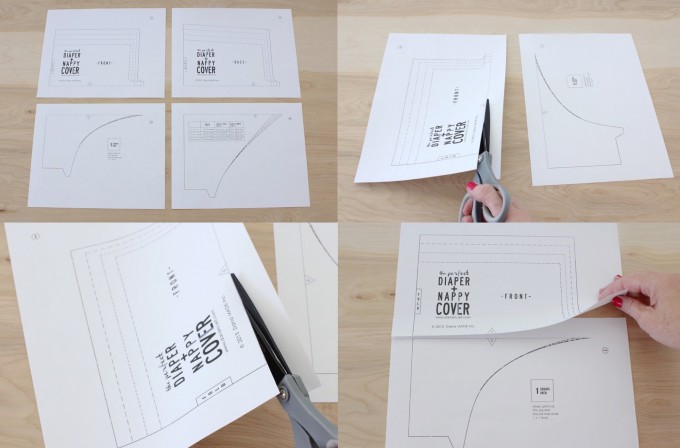
• Cut along the bottom line of the pattern on page 1 and lay it over the top line on page two. The lines and triangles should match up perfectly. Tape the pages together on front and back. Then do the same for pages 3 and 4.
• Then cut along the line for your desired size.
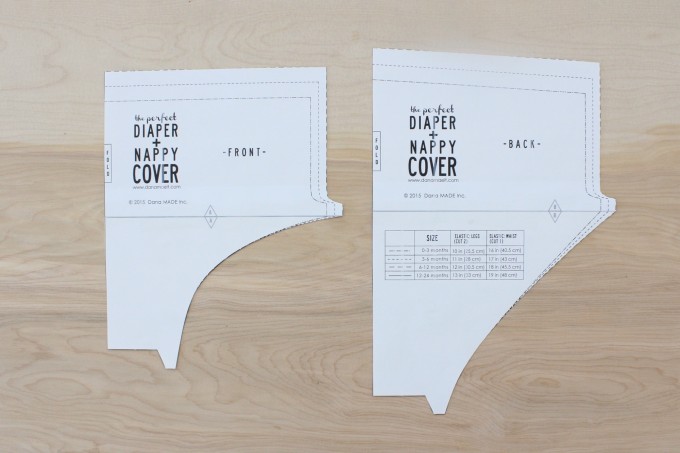
The pattern comes in 4 sizes:
0-3 months
3-6 months
6-12 months
12-24 months
The pattern is easily adjusted to fit larger sizes. If you look at the way the pattern is drawn, there’s a consistent increase (or grading) between each size. So, simply draw additional lines similar to the previous size and increase the lengths of your elastic!
The biggest change to this pattern over the last one is that I’ve added some extra “tabs” at the side seams. This is going to help when creating the casings for our leg holes.
When you’re done you will have two pattern pieces—a FRONT and a BACK.
Now we’re ready to cut and sew!
STANDARD DIAPER COVER
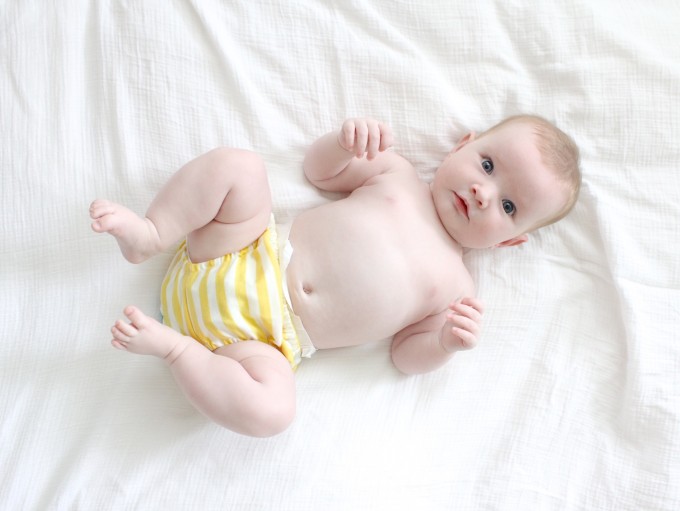
Let’s start with a basic cover—which is probably my favorite to make.
• You need about a 1/2 yard of fabric.
• Make sure you always pre-wash and dry your fabrics before sewing, unless you’re using a specialty fabric that should not be washed.
• Cut one FRONT piece and one BACK piece from your fabric. These should both be cut “on the fold” as specified on the pattern pieces. This means, fold your fabric, lay the pattern piece on that fold, and cut—so that you end up with a symmetrical piece.
Pattern Piece NOTE: The BACK piece will be slightly taller than the FRONT piece. This is to accommodate big baby bum, and also to help the diaper cover fall below their baby belly in front, for comfort. However, the two pieces (the Front and Back) will match up perfectly at the side seams.
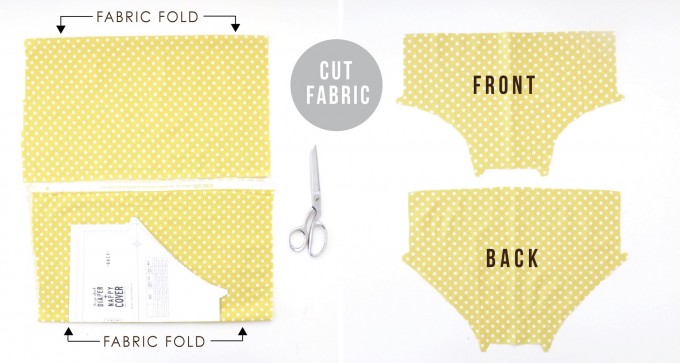
Seam Allowance NOTE: Seam allowances are included in the pattern pieces–meaning, you do not need to cut any additional room around the pattern pieces. Simply cut along the lines in the pattern.
When sewing, we will use a 3/8 inch seam allowance, unless otherwise stated.
When cutting my fabric I like to fold my 1/2 yard of fabric so that it creates two folds that meet in the middle (photo above). Then I cut the first pattern piece on the bottom fold, and I cut the other pattern piece on the top fold—BUT you need to flip that 2nd pattern piece over (not pictured) so that’s the printed words of the pattern are facing down on your fabric, and cut it out flipped, so that your fabric print is going the same direction. It doesn’t matter much with this polka dot print….but on another print you would notice if the pattern print was upside down on your diaper cover.
Sorry. That sounds confusing. Do it once and it’ll make sense.
Sew the crotch seam
• With right sides of the fabric together, sew the Front and Back together at the crotch (see dotted lines below) Sew from one tab, along the bottom, and around to the other tab.
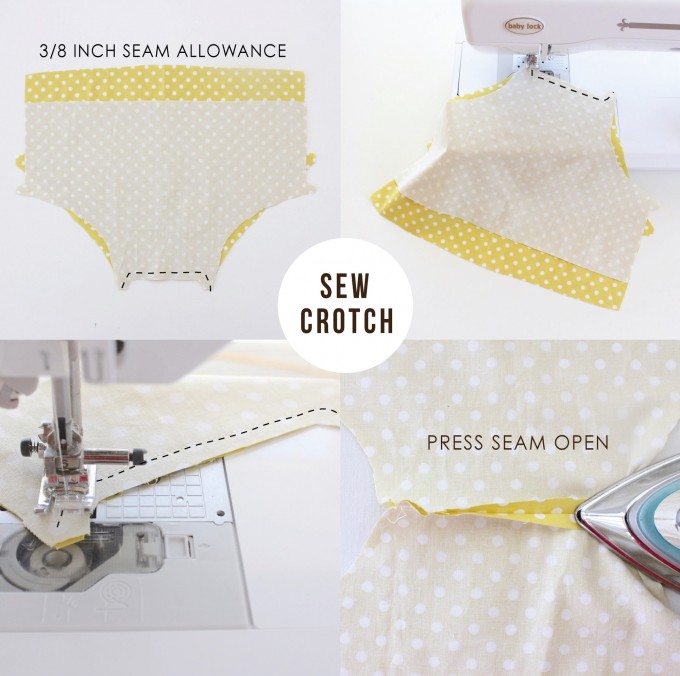
• Press the seam open with an iron. Just do your best when you press the tabs open–they won’t be perfectly flat.
Prep the Leg Casings
I love prepping for the later steps by ironing the fabric when it’s way more convenient. So, rather than ironing the leg casings under once they’ve been sewn in a circle, let’s do it now….while the fabric is flat! Then we can easily fold it into place when we’re ready to sew the leg casings.
• Press the edge of the leg hole under 1/4 of an inch.
• Then press it under another 1/2 inch.
• Do this for both sides.
As you press the edges under, those tabs in the fabric give you extra wiggle room to press everything flat. The tabs will become somewhat folded up inside of the casings, and become flush with the side edge of the diaper cover once you’re done pressing everything in place. 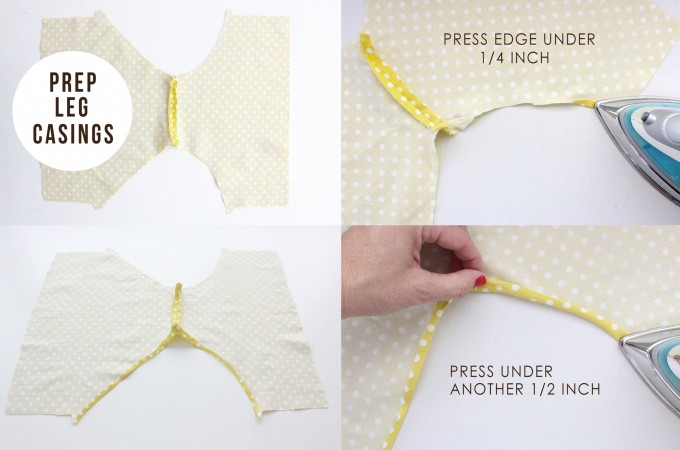
Sew the Side Seams
• Unfold what we just ironed and pin the Front and Back together at the side seams (with right sides of the fabric together). Sew down both sides (remember we’re using a 3/8 inch seam allowance) 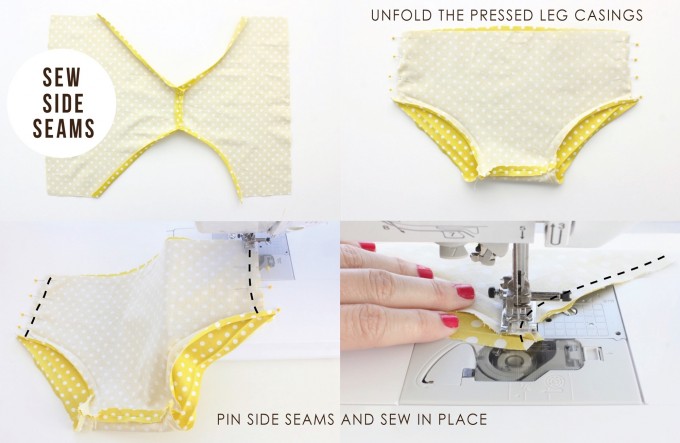
Sew the Leg Casings
• Fold the leg casings under (this is easy to do now!) and pin the casings in place.
• Leave a small opening in each leg for the elastic to come in and out. I like to leave the opening near the crotch so you don’t notice the extra stitching when I’m done. But you can leave the opening anywhere on the casing. And I like mark the opening with double pins so I have a clear Start and Stop point for sewing.
• Sew each leg casing in place. Start sewing at your first set of double pins and sew around till you get to the Stop point (the second set of double-pins). Sew about 1/8 inch from the edge of the casing so you leave enough room to string elastic through the casing. 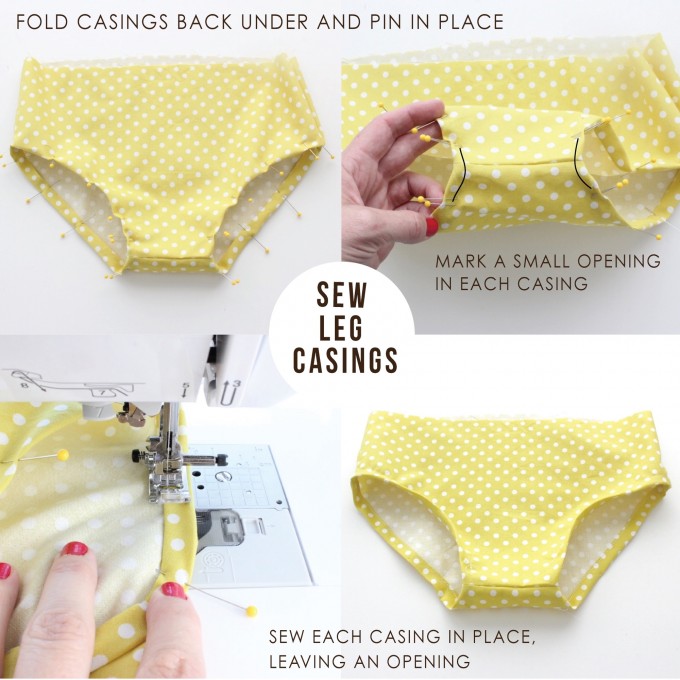
Now grab your elastic!
We’re using 1/4 inch wide elastic, which can be purchased at any fabric store. It’s sold in small packages, or by the yard, or you can buy a monster roll like I’ve done here, so you have plenty for future projects (I purchased this large roll on ebay for about $15. SCORE)
• Cut two pieces of elastic for the legs, and one piece for the waist (the amounts needed for each size are listed on the pattern pieces)
NOTE: if your child has extra chunky legs (meaning: extra adorable) you can always increase the length of the elastic. These sizes are based on average sizes for each age, similar to what you would find in a retail store. 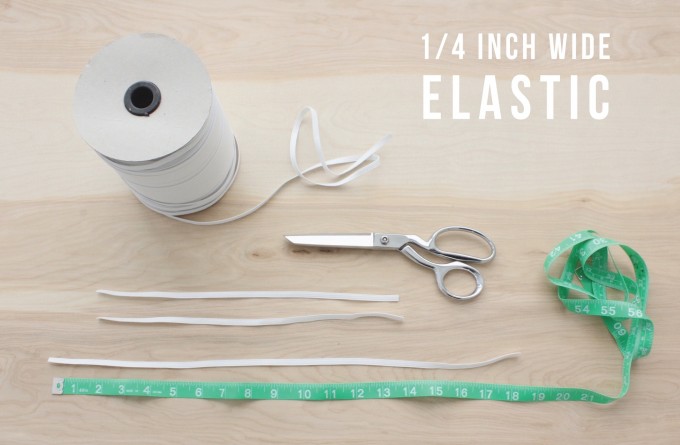
• Attach a safety pin to the end of the first piece of leg elastic. Place it in one of the leg casings, and string it through the first leg till it comes out the other end of the opening.
• Overlap the two ends of the elastic about 1 inch (do your best to make sure that the elastic is not twisted inside the casing, though it’s hard to tell sometimes) and sew the elastic ends together with a zigzag stitch (so the elastic can stretch with the stitch).
• Sew the casing closed.
• Repeat these steps for the other leg. 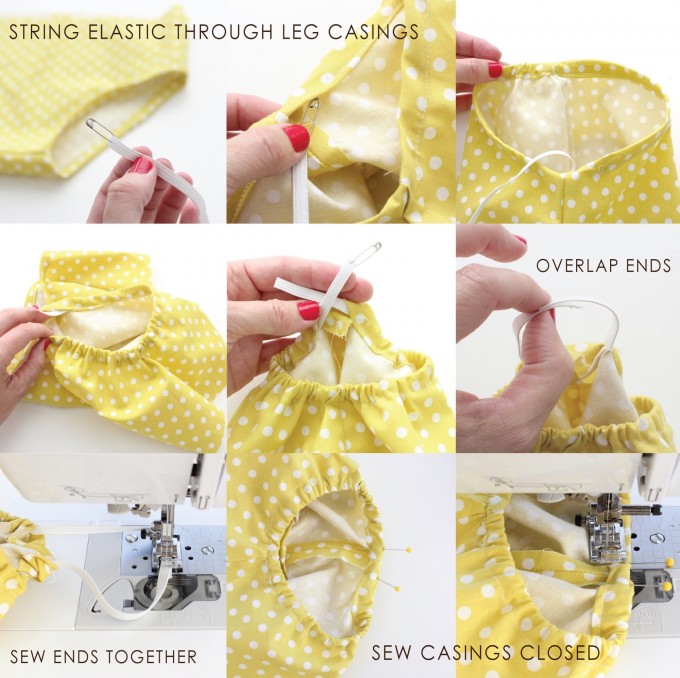
At this point your cover should look like this….an itsy bitsy teeny weeny yellow polka dot bikini:
We’re almost done! 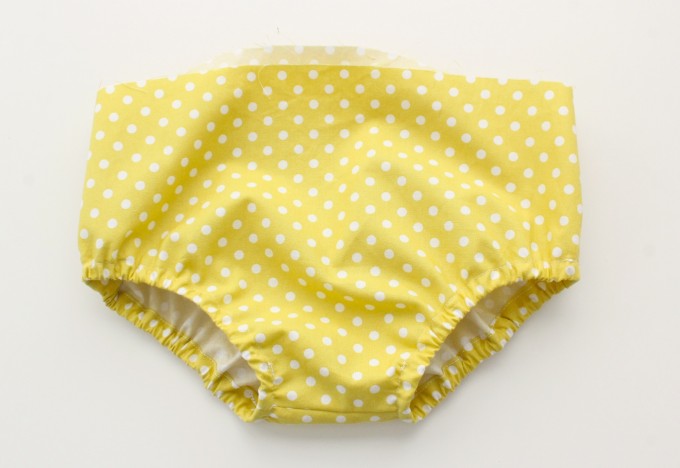
Sew the Waistband
• Iron the waistband in place just like we did with the leg holes. First press it under a 1/4 inch, then press it under a 1/2 inch.
• Sew the waistband in place, leaving a small opening in the back for the elastic. Sew about 1/8 inch from the edge of the casing.
• String the elastic through the waistband, overlap the ends, sew them together with a zigzag stitch, and sew the casing closed. 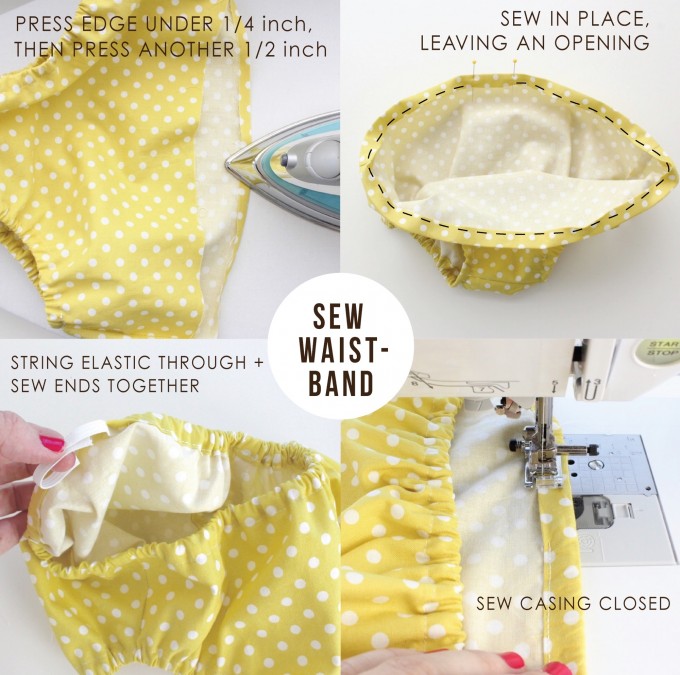
And you’re done! One adorable diaper cover.
Perfect for any baby, for any occasion. 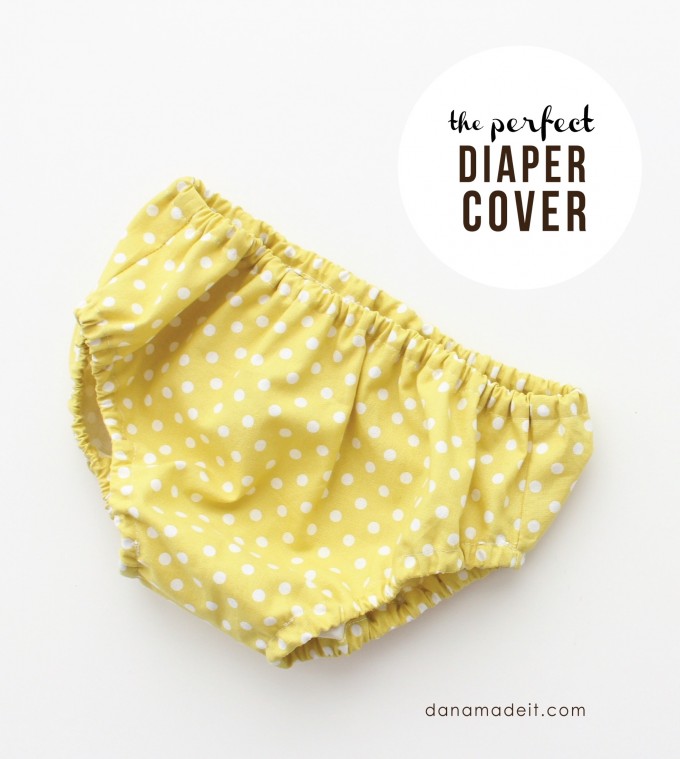
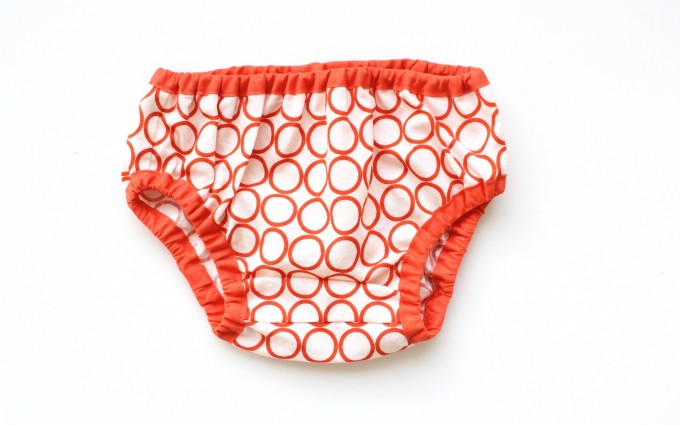
BIAS TAPE BOUND COVER
Now let’s mix it up and add a pop of color and contrast to the diaper cover, using my favorite trim—Bias Tape. 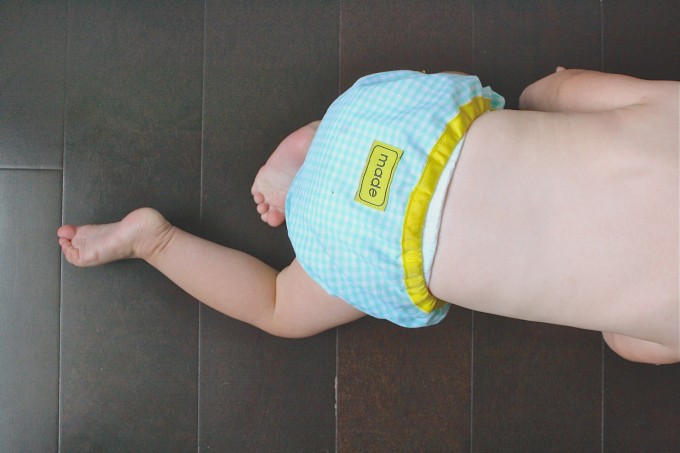
If you’ve never used bias tape before, it’s a fun little trim with tons and tons of uses.
You can buy it at the fabric store, and you can also make your own!
I have a post here and video here explaining all the details. 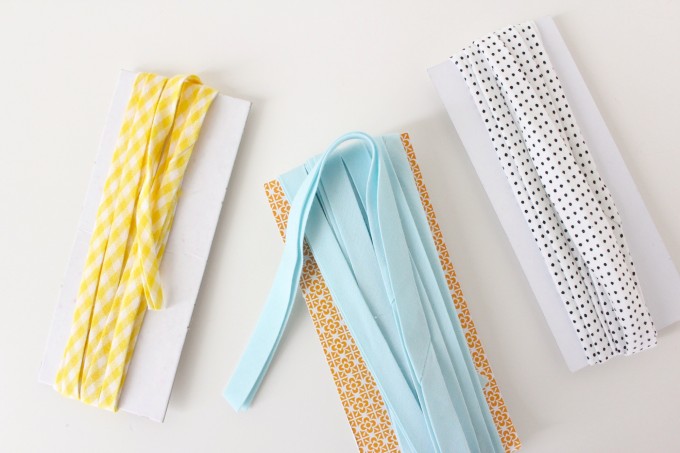
Bias tape comes in Single-fold and Double-fold. What we want to use here is double-fold, so it will bind the legs and waistband, and create casings for us. So let’s start cutting…
• Grab the same pattern and cut your fabric the same way.
The only change we want to make here is to trim away the fabric edge that would have been pressed under to create the casings. So…
• Trim 3/4 of an inch from the legs and from the waistband. Use a ruler to measure and then just do your best; it doesn’t need to be precise. Doing this will actually cut off those tabs.
• Sew the Front and Back together at the crotch (with right sides of the fabric together—just as we did in the previous diaper cover). 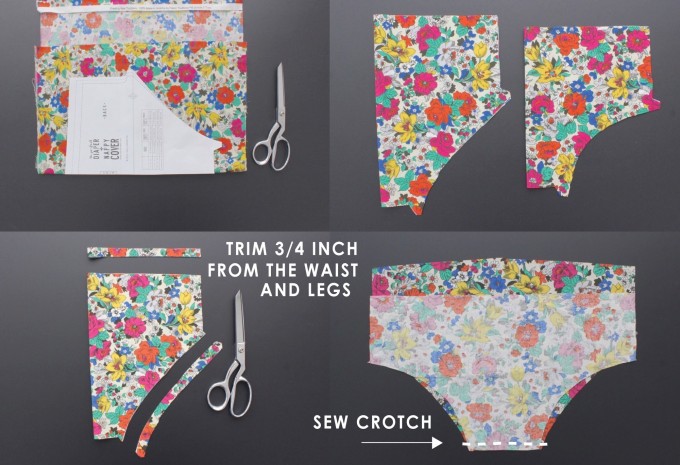
Attach Bias Tape to Legs
• Cut two pieces of bias tape that are a few inches longer than the leg holes. Again, doesn’t need to be precise, but it helps to have some extra length to overhang and give you wiggle room. 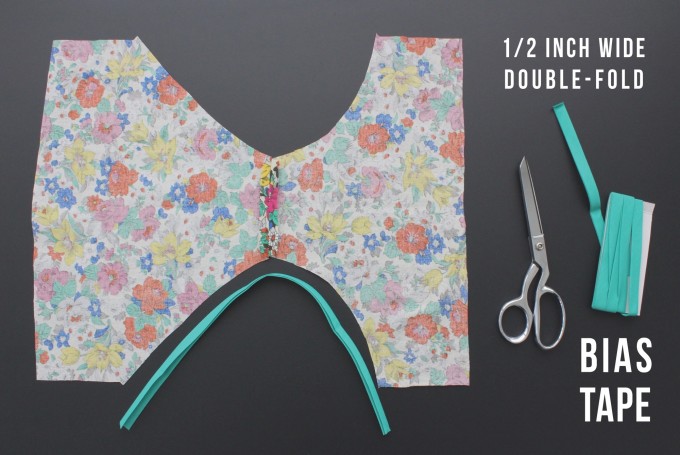
• Unfold the bias tape and pin the RIGHT side of the bias tape to the WRONG side of the leg hole fabric. I know this will feel weird to pin a right with a wrong, but trust me, it’ll work. Leave a little tail of bias tape hanging over the ends of the leg hole.
• Then sew the bias tape in place using a 1/2 inch seam allowance—which is the same thing as sewing on top of that first folded crease in the bias tape.
• Repeat these steps for the other leg hole. 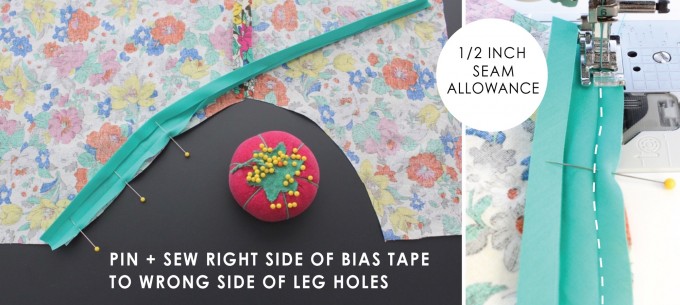
Sew the Side Seams
• With right sides of the fabric together, sew down the side seams (as we did earlier, with a 3/8 inch seam allowance) BUT stop sewing about 1/8 of an inch before you get to the bias tape. Don’t worry if this leaves a small gap in your seam allowance, it will be enclosed in the casing when we fold the bias tape over (see the arrows and the X in the photos below). 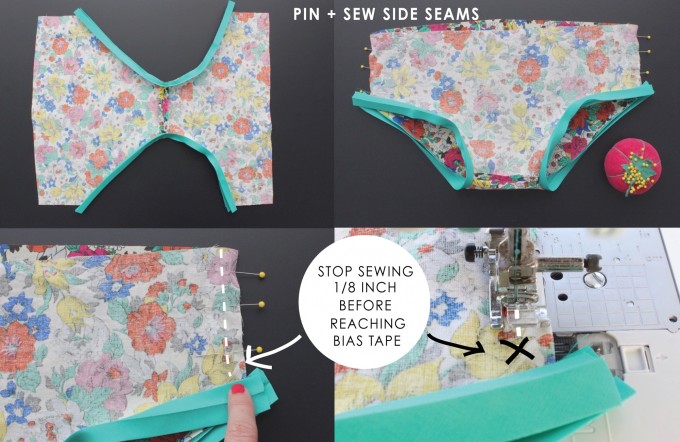
Now you’re probably wondering why we don’t just sew the side seam and bias tape at the same time…but if you do that the raw edge of the bias tape ends will show when we fold it over. I know it sounds (and probably looks) confusing in the photos, but it will make more sense as you go. So….
Sew the Leg Casings
• Sew the ends of the bias tape closed. To do this, unfold the ends of the bias tape and flip them so that RIGHT sides of the bias tape are together. This means that the creases are touching each other.
Pin them together and sew them together—remember that we left a bit of a tail on the bias tape (so we had room to work with) so, you will use more than a 3/8 inch seam allowance. You want to sew it close enough in so that the bias tape will lay smooth all the way around the leg (photos below). Trim off any excess bias tape from your seam.
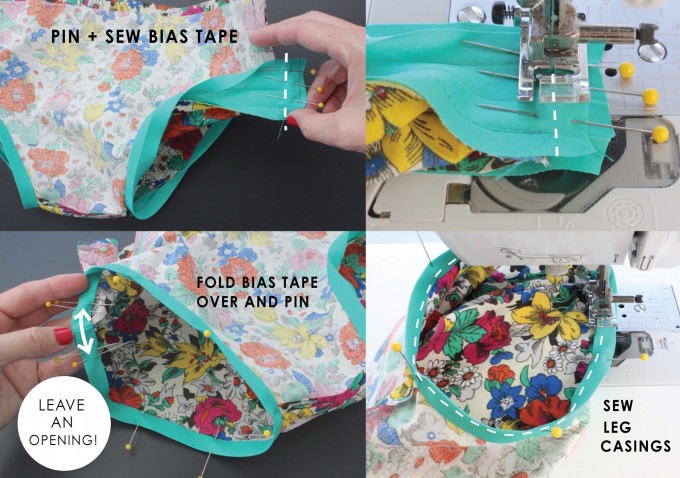
• Then fold the bias tape around to the Right side of the diaper cover leg hole and pin it in place, leaving an opening for elastic to come in and out.
• String the elastic through and sew the casing closed.
Follow all these steps for both legs. 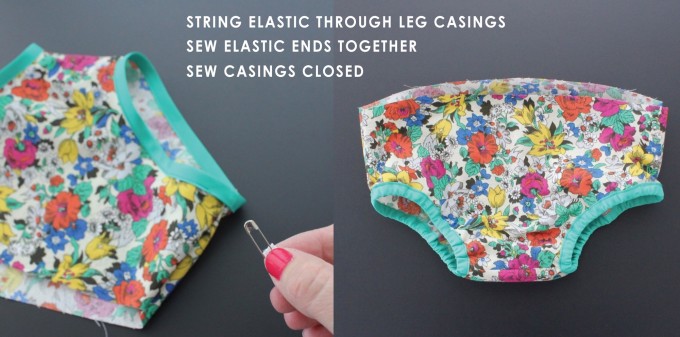
Sew the Waistband
This will be done in a similar was to the leg casings.
• Starting in the back middle of the diaper cover, pin the RIGHT side of the bias tape to the WRONG side of the diaper cover fabric. Leave a small tail at your start point.
• Pin all the way around the waistband and when you get back to the start point, leave another small tail (photos below)
• Join those two ends together to determine where the bias tape should be sewn together, and sew the ends together so that the bias tape lays flat, and fits around the entire waistband. 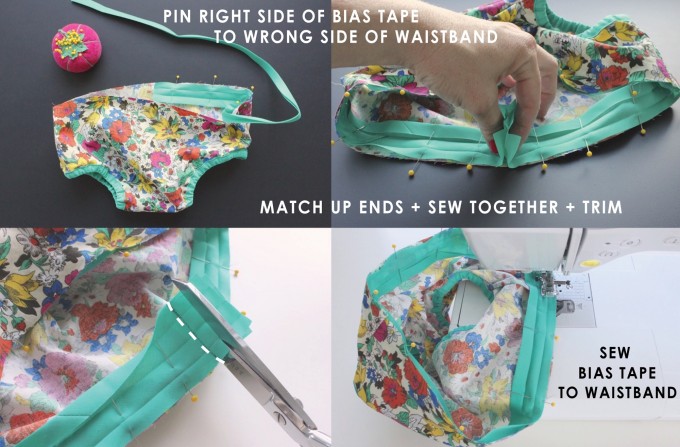
• Sew the bias tape in place on the waistband, sewing with a 1/2 inch seam allowance (or by sewing along the first crease in the bias tape.
• Fold the bias tape over to the Right side of the fabric, pin it in place, and sew it in place, leaving an opening in the back of the waistband for elastic. 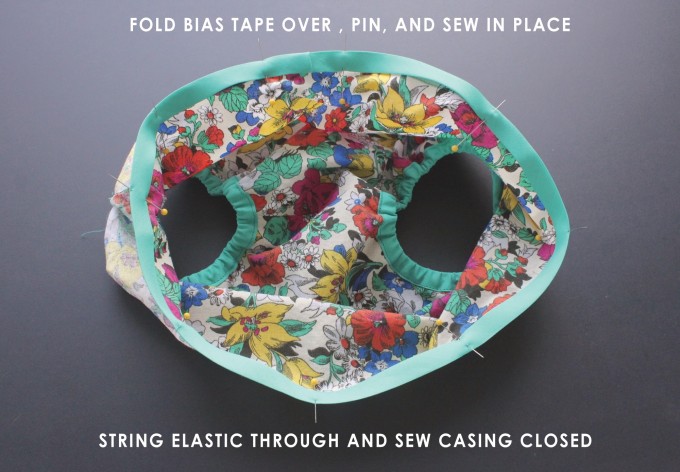
• String elastic through the waistband and sew the casing closed.
And…you’re done!
Yay! 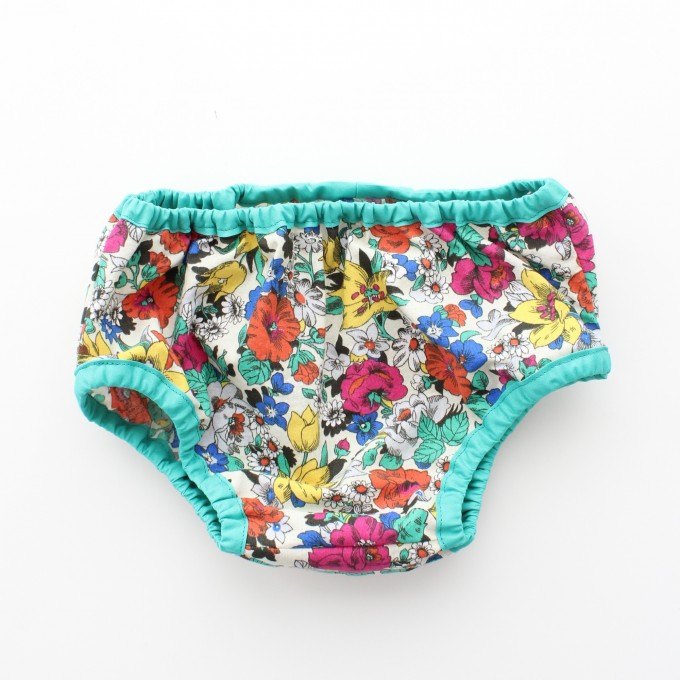
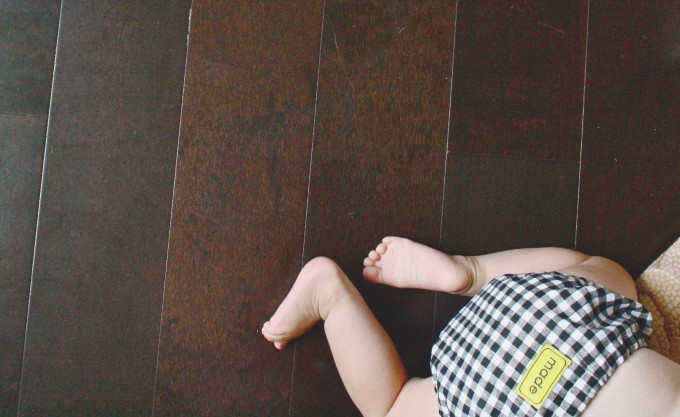
For added pizzazz, sew a personalized label to the back (read more about my labels here). 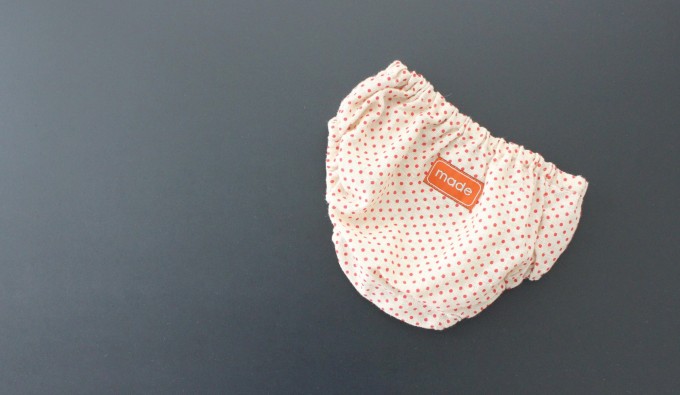
And then, start going crazy!
Add ruffles to the bum, maybe different fabrics on the front and back? And definitely some fun appliques… 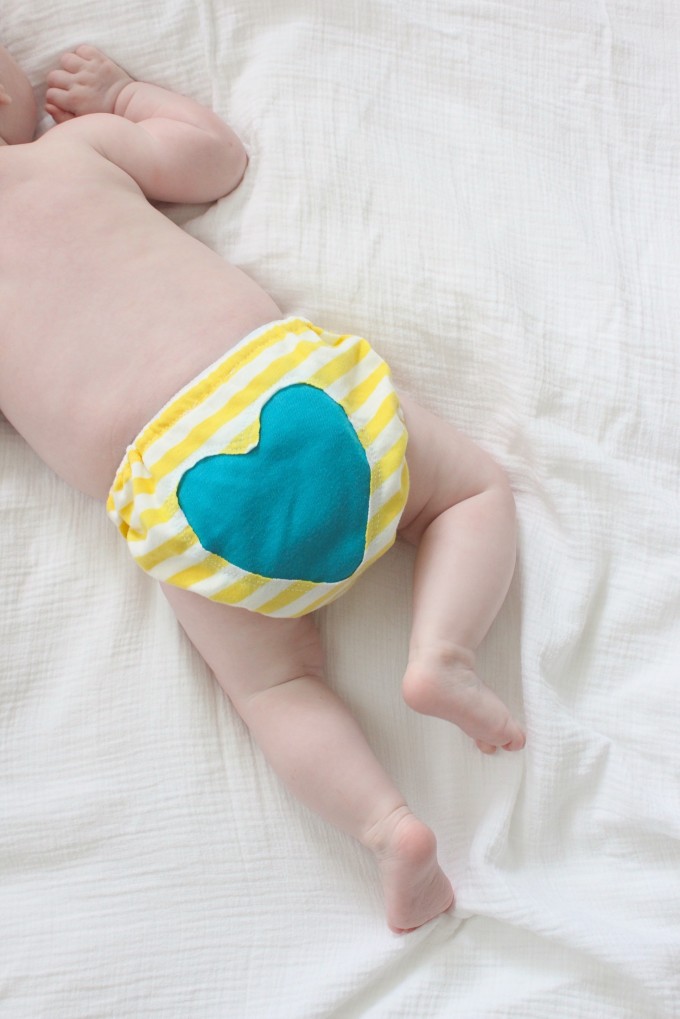
This is actually a reverse applique, meaning that I cut OUT the heart from the diaper cover to create negative space, and then sewed a patch of fabric to the wrong side of the diaper cover (rather than sewing a heart on top of the diaper cover).
I also used knit fabric for all parts of this cover, so the raw edges of the heart won’t fray.
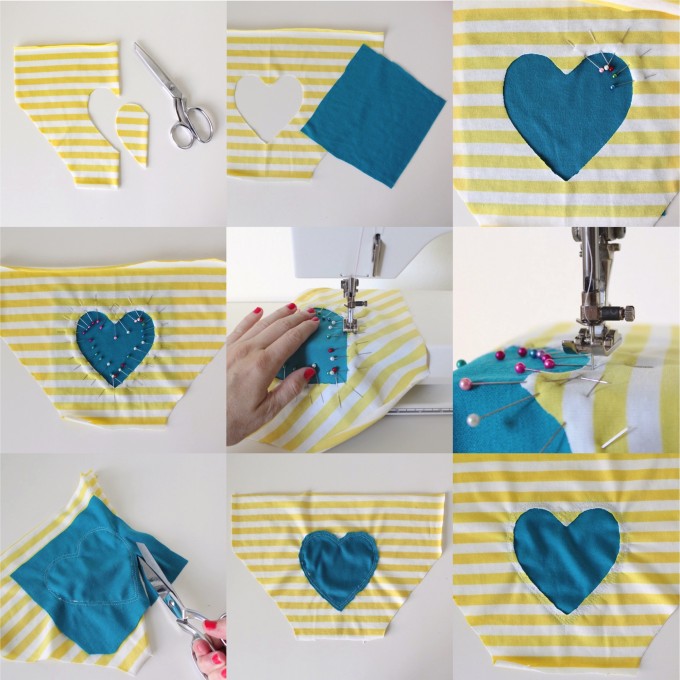
When doing this…
• Be liberal with your pins so everything stays in place
• Go slowly around the curves of the heart and stop periodically, leave your needle down, and lift your presser foot to allow the fabric to relax and bounce back.
And just like that, you’re a pro at the secrets of diaper covering.
Your baby will thank you one day.
But for now, she’s escaping…. 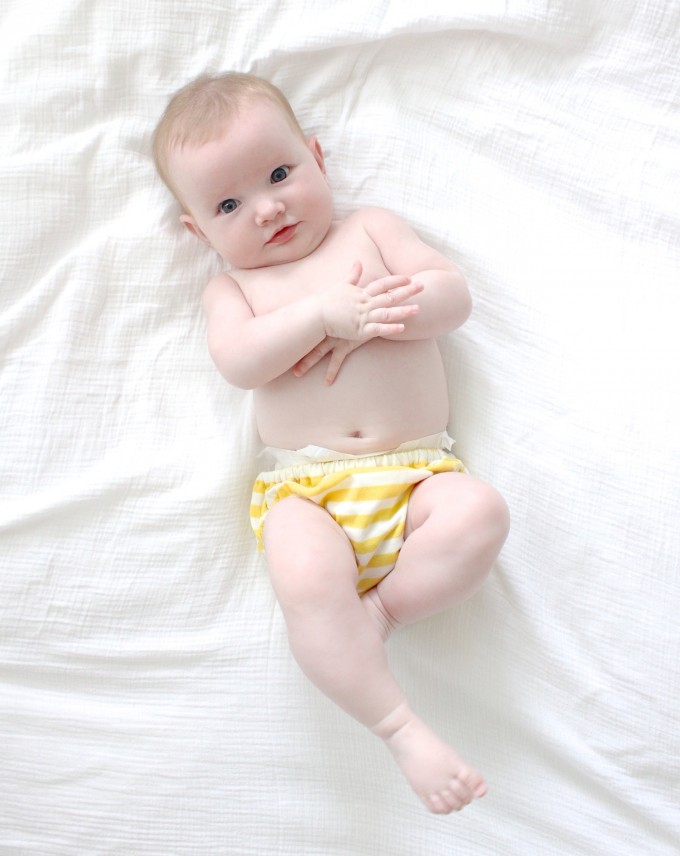
Happy sewing friends!
Love these diaper covers, so cute! Thanks for the detailed pattern and tutorial! I love Seventh Generation diapers, they are plain white, I’ve never had a blowout, and they are better for the environment! 🙂